Showing posts with label quilting. Show all posts

Tuesday, December 6, 2011

Sweet! 16

Ok, so I finally quilted something other than circles and stipples, thanks to my HQ Sweet 16. It’s SO much easier to focus on FMQing when you’re not wrestling the quilt around a domestic sewing-machine needle. Here’s the quilt (awful pic, I know; more on that later):


And here are close-ups of the quilting:


I did an all-over leaf pattern, with a flower pattern on the borders. It was fun (ok, yes, I’m a dork).
I’m still having problems taking full-length pics of my quilts. I can get the close-ups to represent the colors just fine, but there are problems with lighting when I have to back up for the wider-angle pics. We’ve had rain in Central Texas (hallelujah! finally!) for the past few days, so no outdoor pics are possible. I’ll keep working on it, though.

Back to work now!

Saturday, August 13, 2011

Rose Petals

Thanks to everyone for your kind comments about the Rose quilt that I blogged about yesterday: http://textiletraveler.blogspot.com/2011/08/roses-not-on-my-table.html

A couple of people asked this: how do you get the curved/wavy outside edges on the roses? Unfortunately, I didn’t take pics of the process as I went, so I’ve reconstructed the steps in (very primitive) drawings to try to illustrate the process. It’s harder to explain how I did it than to actually do it, btw.

As I mentioned in the previous post, I used a typical crazy-quilt type block. I started in the center with the pink or red fabric for the rose, then kept moving out until I switched to green and completed the block. At that point, I had a 5-sided “rose” that I wasn’t crazy about because the edges were straight:

RoseBlockDrawing1

To add a wavy edge to the rose, do the following:

1) With the block right side up, lay a piece of “rose-colored” fabric right-side-down against the block, along one edge of the rose
2) Stitch the fabric down to the block along the straight edge of the rose
3) Flip the stitched-down fabric back and press

RoseBlockDrawing2

4) Trim the stitched-down fabric so that’s wavy.
5) Sew the next piece of rose-colored fabric down along the next edge, flip, and press
6) Continue to add pieces to each of the 5 sides of the rose
    RoseBlockDrawing3
      7) Once all the rose-colored pieces have been stitched down, pressed open, and trimmed, sew the edges down to the block with matching thread. I used a zig-zag stitch.

      RoseBlockDrawing4
        I hope that helps! There’s probably a simpler way to do this, but this method worked for me :-)

        Friday, August 12, 2011

        Roses (Not) on My Table

        A while back there was a discussion on the Quiltart list about using scraps to make quilts. I’m a compulsive scrap saver, and sometimes when I’m too nervous to cut into that gorgeous fabric I bought, or when I’m not really sure what kind of quilt I want to make, it’s easier for me to start playing around with stitching scraps together.
        These blocks were made in crazy-quilt fashion. I initially moved right from the red & pink of the roses into the green, but the flowers looked too blocky. I ended up stitching another layer of pink or red to the edge of each flower, then flipping it open, trimming it into a curvy shape, and stitching down the edges. I like the softer, curvy edge of the flowers better than the original “crazy-quilt” block.

        rose_block

        I quilted each block as I went, then put them together using Fiona’s Quilt as You Go (QAYG) tutorial. I love putting quilts together this way, because I don’t have to wrestle a large one under the needle of my small machine, but I’m still having some problems with the stitching. My walking foot a,nd feed dogs don’t really “grip” the multiple layers of fabric well and move them through the machine at an even rate, so any of the stitching that shows can look very uneven. I had a lot of this bad stitching showing on the back, and unfortunately it was white thread against a pink background, so I ended up painting the thread to match the fabric. You can still see the stitching, but you have to look more closely now :-)


        finished_quilt
        finished_quilt3

        Not bad for a bunch of scraps, dont’cha think?

        Friday, April 8, 2011

        Zippety Doo Dah!

        So, as I was getting ready for the yoga retreat, I went to pack my little art-supply kit. You know, that ugly plastic box that all the pencils and things rattle around in.

        What I really need, I thought, is a lovely little fabric bag for my art supplies. You know, the kind with a zip . . . zip . . . zippppppperrrrr (that's me shuddering). I've never put a zipper into ANYTHING, and I've never understood how to put a zipper in.

        How does a zipper foot work? How do you get the zipper the right size? Why does the foot have to be skinny? Oh, I've read all about putting zippers in, numerous times. But I've just never really understood the concept.

        This time, though, I decided that I just needed to jump right in and create a bag and put the darned zipper in. I started with some painted fabric I've had forever, layered it on batting, and free-motion quilted it.


        Then, I just rolled the rectangle over so that the two long edges were touching. I put one long edge right sides together with the zipper and pinned it. I got out the zipper foot for my Husqvarna Viking machine (which doesn't actually look like any zipper foot I've ever seen)

        and put it onto my machine. I spent about 30 minutes trying to figure out how to sew with the foot, and finally took it off and just put a regular foot on (with a channel underneath for the zipper teeth). I stitched one side of the zipper to the long edge of the rectangle, then realized that somehow I had sewn the zipper on upside-down, backwards, and inside-out (or something). I ripped the seam out, started over, and managed to sew it correctly this time. Then I sewed the other side, turned the tube inside-out (and unzipped the zipper half-way, stitched up the sides, and trimmed the zipper.

        Voila! A zippered bag! Not the most perfect zippered bag, but zippered nonetheless! I happily went to transfer my art supplies into the bag and realized that it was too small. I had measured for the length of the pencils, but didn't measure the size of my little watercolor pan set. Back to the drawing board. . . .

        This time I started with  a small UFO that has been driving me crazy for a very long time; sadly, my photos are SO disorganized that I couldn't find a before pic. At any rate, I used this UFO to create a larger bag; this time, I made sure that everything, including my small sketchbook, would fit. Here are both bags together:


        Hurray! Two zippered bags. I feel like a whole new world has opened up to me, and I can't wait to make more!

        Saturday, March 12, 2011

        Quilt As You Go

        I seem to have a never-ending supply of scraps. This comes in handy when I’m reluctant to cut into my gorgeous “new” fabrics (although yes, I am fully aware that my kids would sell my gorgeous fabrics in a garage sale for nothing were I to head for the Big Quilting Studio in the Sky).
        Anyway, I kept stitching the scraps together, then joining them with other fabric, until I had 12 of these 18” squares:

        scrappy_batik_block
        Around the same time, I ran across this “quilt as you go” tutorial, so I decided that would be perfect for my blocks. I do get tired of wrestling big quilts under the needle of my machine to quilt them.
        This time, I quilted these blocks individually, then attached them together according to the tutorial. It was easier than I thought it would be, and I love the result.
        scrappy_batik_complete

        Next up on the agenda: finishing up some old WIPs and UFOs, and working on some surface design techniques. But the next pieced quilt I make WILL use some of those gorgeous “new” fabrics!

        Monday, October 25, 2010

        Present Tense

        So I DID get a few things done over the summer . . . now that that's clear, fast forward to this week!

        Here’s what I’m working on now:

        Dyed fabric. I’m trying to get solids, because I’m reading Jean Wells’ Intuitive Color and Design. She uses a lot of solids in her work, and I love the way they look.

        I used the gallon plastic bag method and squished a lot, but I still got some mottling:

        solids

        I machine-pieced this quilt top a couple of weeks ago. Then I thought I would try some needle-turned appliqué. Why? Well, this is going to sound silly to some people: I love certain TV shows, but I get bored watching them and need something to do with my hands. I really enjoyed the hand-appliqué process and think I’ll do more of it. I’m using the methods from the Becky Goldsmith & Linda Jenkins Teach You to Applique the Piece O' Cake Way DVD, and it’s really not difficult at all:

        floral_applique

        I think I’ll hand-quilt it, as well.

        Finally, I’m taking yet ANOTHER online class—this one with Jane Lafazio on her watercolor sketchbook techniques. Here are my first watercolor sketches:

        sketch1

        sketch2

        sketch3 


        I love these little sketches because they are quick and there’s no pressure, but I learn a lot about color, highlights and shadows, white space, composition, etc. Look for more of these in the next couple of weeks!

        Is everyone excited about the Houston Quilt Show???!!!

        Tuesday, December 15, 2009

        Quilts and Clay: Book Reviews

        I stopped by the library the other day to pick up a couple of novels, and I was thrilled to see some unfamiliar craft books on the New Non-Fiction shelves. It turns out that neither of these books are exactly “new” (they were both published in 2008), but just new to my library, I guess.

        The first one really got my heart pounding: Hand-Dyed Quilts by Marquetta Bell-Johnson. What could be better than combining two of my favorite things, quilting and hand-dyed fabrics? Plus, the author sounded familiar, and as I flipped through the book, I realized that I had seen her on an old episode of the tv show, That’s Clever! (or maybe it was Crafters Coast to Coast, the show’s earlier incarnation). In fact, I was so excited when I originally saw Marquetta’s episode that I immediately created some “hand-dyed” fabric based on her instructions. Here are the results:

        airbrush_colors

        Now, one reason I was excited was because, at the time, I knew nothing about dyeing fabrics, and I had no dyeing supplies. Bell-Johnson doesn’t use traditional fabric dye, however; instead, she uses airbrush paints (which I happened to have on hand), so technically her fabric is not dyed, it’s painted. However, Belle-Johnson claims in her book that airbrush paint, while an acrylic, migrates through the fabric and bonds with the fibers, which might explain why she classifies this technique as dyeing rather than painting.

        At any rate, Hand-Dyed Quilts is an extension of the basic techniques the author demonstrated in that television episode. She takes us through the process of coloring the fabric, and most of her patterning is accomplished through various fabric-folding techniques, which are detailed in this book and include nice illustrations of luscious patterned fabric created through lots of color and folding variations.

        Bell-Johnson’s book also includes basic quilting information, but this section of the book is disappointing, to say the least. It’s not clear who the intended audience is here. For example, hand-quilting instructions include this information:

        1. Begin your stitches by backstitching and burying the thread tail between the layers of the quilt on the back side . . .

        2. Sew, using the running stitch and following your chosen design . . .

        Now, if I’m new to hand quilting, I’m not sure I’ll know what a backstitch is, how to bury thread tails, or how to complete a running stitch. I’m probably asking, “what is my ‘chosen design’ and how do I get it onto the fabric?” On the other hand, if I already know how to do these things, I’m probably familiar with hand quilting and so don’t need this section at all.

        The last section of the book is a compilation of simple quilting projects, none of which really caught my attention or inspired me to create. However, I can imagine that new or fairly inexperienced quilters might find them useful for learning basic piecing and for completing simple projects using the fabric they’ve colored.

        For me, this book was, overall, disappointing. I think the detailed information on folding and coloring fabric makes Hand-Dyed Quilts worth owning if you’re interested in that type of thing, particularly since the cost of it is fairly reasonable on Amazon (and especially if you get a used copy). On the other hand, there’s probably not much even in the fabric-folding section that can’t be found in a book on shibori.

        Tomorrow’s review: Polymer Clay and Mixed Media Together at Last: Incorporating Craft Materials and Found Objects in Clay Figures, by Christi Friesen. Despite the ridiculously long title, you’ll want to stick around for this one if you’re interested in polymer clay.

        Saturday, September 19, 2009

        Oh Baby!

        I finished the crib-size scrap quilt I’ve been working on. Here’s the finished quilt:

        leftover_blocks_complete_front
        leftover_blocks_complete
        leftover_blocks_complete2

        No one in the family is expecting a little one right now (pretty unusual for my HUGE family), so I’ll put this one up and save it or else check into donating it to Project Linus.
        I used a REALLY cool tip to sew the binding onto this quilt. I saw this on “Sewing with Nancy.” I sewed the folded binding onto the front as usual for a double-fold french binding. Instead of hand-stitching the binding to the back (something I really enjoy doing, but just don’t have time for right now) though, I flipped the binding to the back and machine-stitched it from the FRONT:
        binding_front

        Using invisible thread, you sew right in the ditch next to the binding (again, on the front). You’ll get a seam on the back that looks like this:

        binding_back

        And, because this is invisible thread, you can barely see the seam. This is the best solution I’ve found so far for sewing a nice-looking binding by machine.

        Friday, September 18, 2009

        DOH! Tension Problems

        I bought my current sewing machine about 2-1/2 years ago. My old Singer functioned just fine for plain sewing (which I never did, so I hauled it out about once a year to make a repair), but I wanted to be able to FMQ, so after looking at a Husqvarna Viking (and its price tag) and protesting that I didn’t NEED a new machine, my sweetie insisted I buy it.

        Ever since, I’ve been really unhappy with the machine, solely because I could never get the tension right. Sometimes it was fine, and other times it was a mess. I’ve spent hours adjusting the upper tension wheel, rethreading the machine, changing out needles, and turning the thread spool in every conceivable direction, all in an effort to get even thread tension. On the best of days, I was able to get stitching that looked like the bottom tension was slightly tight (or the top tension slightly loose).

        I had finally decided it was time to take the machine in to have a pro assess the problem. In the meantime, I was going through my usual routine this morning in an effort to get something at least resembling good tension, but all I could manage was this:

        tension_problems

        Then, as I sat looking at the machine, I had a thought. When I thread it, I’ve always run the thread behind the tension disk or the tension plate or whatever it’s called:

        tension_machine copy

        But, I thought, what if I ran the thread in front of the disk? I gave it a shot, and here are the results:

        tension_problems_after

        Wow! Finally, decent tension! I’m a little annoyed that it took me this long to figure this out. I could blame the saleswoman at the sewing machine store, who had me thread the machine to make sure I could do it, but who obviously didn’t realize I wasn’t doing it correctly. I could blame myself for not carefully reading the manual and/or taking it in so someone could figure out that I was threading it wrong. On the bright side, I’m almost as happy as if I had a new machine!

        I’m off to FMQ with my “new” machine.

        Wednesday, August 12, 2009

        Quilting 101

        Yesterday, I cleaned off my sewing table and made my quilt sandwich for my double-sized quilt. I was SO careful to make sure the backing fabric was “taut and smooth, but not stretched” as the books, blogs, and sources suggest. I spray basted and hand basted. I rolled up the quilt the way the same sources suggested (note: I’ve done quite a bit of free-motion quilting, and have actually gotten pretty good at it. But I’ve never quilted anything this large before).

        Today, I started free-motion quilting and immediately found myself fighting the quilt, barely able to move it around under the needle. I turned to the wise and experienced members of the Quilt Art list, and without exception, everyone said to do away with that log-roll I had to the right side of the needle. Just that one suggestion helped immensely, and free-motion quilting was a lot easier once I unrolled that log and just smooshed the fabric into the throat of the machine. (The experts gave me some other good advice, as well: get the quilt lifted up level with or above the machine, so it’s not pulling down against the machine, for example.)

        After machine-quilting for a while, I turned the quilt over and saw a couple of frustrating tucks. Even worse, the backing fabric was pushing out past the basting I had spent so much time working on. I knew I needed to tear it all out, but I wondered whether it would work to re-baste only small sections that I was about to quilt. Someone I was corresponding with regarding free-motion tips said that’s exactly what she does: she only bastes or safety pins a small section of the quilt at a time, then quilts, stops quilting, presses the backing out, and pins new sections.

        I guess there’s just no substitute for experience. But it’s so frustrating to pull out my books and follow instructions that not only don’t work, but that actually hinder progress. Thank goodness for the Internet and the Quilt Art list!

        Ok, rant’s over; back to the quilting!

        Thursday, June 25, 2009

        I’m Still Here . . .

        sort of. I haven’t felt very well since my surgery. I had my follow-up appt. with the surgeon yesterday, and he said he wouldn’t have expected that I would be chipper and feeling well at this point. He’s revised his recovery time from 6 to 8 weeks, since this is what he calls a “re-do” (the 2nd surgery for the same issue). Plus, I’m fairly sure that the surgery kicked off another bout of pancreatitis, which the surgeon had said was likely. ANYWAY, enough of this boring stuff.

        I have been hand-quilting my Garden Path quilt since I was in the hospital three weeks ago. I actually started this quilt almost exactly two years ago; I was writing in my 10-year journal the other day and noticed an entry from two years ago where I had written about completing the quilt top.

        And now, I’ve finished it! Garden Path is 42”h x 26”w and is machine-pieced, raw-edge appliquéd, and hand quilted. Here are the results:

        garden_path_quilted

        And a close-up:

        garden_path_quilted_closeup

        The center of this quilt was originally a "convergence"-style quilt (from Ricky Tims' book, Convergence Quilts). I cut the plants and butterflies out of batik fabric and machine-appliqued them over the center panel, then added the borders.

        I feel such a sense of accomplishment when I finish something like this. Otoh, I’m temporarily project-less and I don’t have the energy to start something new. I’m sure if I look around, though, I’ll find plenty of WIPs from the last couple of years that I can work on.

        Thursday, May 28, 2009

        WIP? or File 13?

        Here is a piece I have been working on, and I’m just not sure where to go with it. I feel like either it’s a) really awful; or 2) missing something important. If the latter, I can at least work on fixing it; if the former, I may as well give up now.

        What do you think? Should I keep going with it? Is it too busy? Are the colors just ugly? Too many textures? Does it lack contrast? Is there a good focal point? Is it boring?

        Any and all comments and suggestions will be appreciated, and please remember that you can make anonymous comments.


        Monday, May 25, 2009

        Another Book Review

        After writing yesterday’s post about the way I tend to read craft books, I challenged myself to slow down and read the next one carefully, from beginning to end. Fortunately, I had the perfect book for this type of exercise.

        I’ve made a couple of quilts that I stitched first, then colored with either Neocolor crayons or fabric paints. I really enjoy this “backwards” process and have been wanting to pursue it further. So when I ran across Stitching to Dye in Quilt Art: Colour, Texture, and Distortion by C. June Barnes, I knew I had to have it. I glanced at it when it came in the mail, but it wasn’t until I was scouting around for my next project that I remembered I had it.

        Barnes’ book includes good, basic information about dyeing fabrics, free-motion stitching, the types of fabrics that work best with her techniques, etc. In addition, there are two extended technique sections in the book, both packed with information and exercises. The first section deals with stitching various fabrics together, adding free-motion stitching, then dyeing the quilt.

        The second section was a surprise for me, since I primarily bought the book for the previous technique. In the second section, Barnes details ways to differentially shrink fabric, which I’ll come back to later in this post.

        The book includes exercises that progress in difficulty, so after reading through to the end of Exercise 1, I decided to jump in and give it a try. I pulled out various white, off-white, and cream-colored fabrics and pieced them together. I made my quilt sandwich and free-motion quilted it using cotton thread so that it, along with the fabric, would take dye. Here’s a pic of the small quilt:
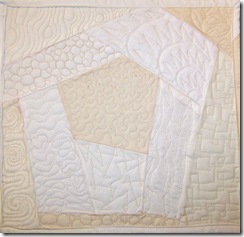
        stitch_dye

        I then dyed the quilt in a mix of Sky Blue & Magenta:

        stitch_dye_dyed

        As you can see, the various fabrics take the dye differently and create an interesting mix of textures and colors. Barnes recommends that you dye your pieces flat in a shallow tray or pan, or in a large bucket. I didn’t have a pan large enough, so I tried squishing this piece into a container and periodically squeezing the dye through. As you can see, I ended up with a few mottled spots, so before I try the technique again I’ll head to the store for a large, flat tray. This piece is now ready to be further embellished; Barnes also includes ideas in her book for additional embellishments.

        As I mentioned, the second half of the book focuses on layering different kinds of fabric that shrink at different rates, stitching them, shrinking them through washing and drying, then dyeing them. For the first exercise in this section, I started with wool and layered silk charmeuse over it. I heavily stitched the piece with cotton thread (Barnes includes some excellent information on the effects of various kinds of stitching)
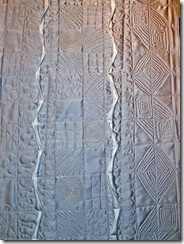
        stitch_dye_wool

        then washed and dried the piece

        stitch_dye_shrunk

        I haven’t yet dyed this, but I’m very happy with the texture that resulted. Barnes includes a lot of information in this section of the book about various inclusions to get particular effects, so I’m anxious to continue these exercises, as well as those in the first half of the book.

        I’m really thrilled with this book and looking forward to continuing to work through it. In fact, I’m so excited about it that I’m considering starting a group to work through the exercises in the book and to share questions, ideas, concerns, and results with each other. I won’t be able to do that until I’ve recovered from my surgery, but let me know if you’re interested in participating, and I’ll get back to you within a few weeks.

        Stitching to Dye in Quilt Art: Colour, Texture, and Distortion by C. June Barnes is available on Amazon. Unfortunately, it’s not one of the books you can “look inside” of, but you can find more information through that link.

        Addendum: Although there's no "look inside" feature on the US version of Amazon for this book, Sue left a comment on this post letting me know that sometimes books published in the UK have the “look inside” feature on Amazon UK. So for anyone who wants to take a look inside Stitching to Dye, click here.

        Tuesday, April 28, 2009

        Where Do I Put My Books Now?

        I was able to finish sewing the binding on my screen-printed table runner while in the hospital (is it strange that I love hand-sewing the binding?), but then I needed to block it because it was so wavy.

        It’s been a while since I blocked anything, but I didn’t bother to look up the directions, I just went ahead with it. Then I let it dry (and forgot about it) for 3 days.

        I’m thinking I stretched it a little too tightly, because you can see where all the t-pins were. Plus, blocking it seems to have stretched out some of that lovely quilty puffiness that I like so much for pieces like this. Maybe I’ll rewash and dry it, and see if it straightens out.

        It’s difficult to get good pics of a piece this long and narrow, but I’ve tried to capture most of it:

        Screenprinted_table_runner

        All the fabric in this piece is either screen printed or hand-dyed (LWI and shibori) by me. I created the pattern to piece it, which may seem like a minor accomplishment, but which actually took quite a while! Anyway, all that is to say I’m proud of it, pleased with it, and more than a little fond of it.

        Screenprinted_table_runner_closeup

        Of course, now that I have a lovely table runner, I had to clean off the breakfast room table. That means actually reshelving all those books I carry outside to the back patio to read on my breaks.

        Thursday, April 16, 2009

        Screen Printed Fabric

        I seem to be better at decorating fabric than figuring out what to do with it.

        More screen prints. This time, I created a stencil (or is it a resist?) on the screen using Elmer’s gel, which I drew onto the screen right out of the bottle.

        frame_screen_glue

        I used Setacolor fabric paints, and I was able to get quite a few prints out of the screen without the dried glue softening up; here are some of the cleaner ones:

        screened_flower1_small screened_flower2_small


        screened_flower3_small screened_flower4small


        screened_flower5_small

        Now, what to do with them? I had been thinking we needed new placemats for the breakfast room table, but then I thought, why not a table runner? I drew the pattern out, then cut up some of my hand-dyed fabric and pieced it, along with the flower screen prints. Here’s the finished top:


        Now I’m wondering whether this might be a little dark for the table, and I can’t decide if I should make a wall hanging out of it instead; it’s very tall and narrow (60”x24”), so I’m not even sure where I would hang it!

        Monday, April 6, 2009

        Nostalgia: A Trip Down Memory Lane

        I have a hankerin’ (hey, I’m from Texas; it’s part of the required vocabulary, along with y’all and fixin’ to) to make a larger quilt. Everything I’ve been working on has either been small—samples, journal quilts, mixed media pieces; or experimental—painted and dyed fabric, painted canvases, stamps, screen printing. The only larger pieces I’ve made have been for class projects.

        So all night I had thoughts/dreams/ideas about creating a larger quilt. I hadn’t decided whether it would be a wall quilt or a “bed” quilt (ok, I haven’t yet made anything large enough to cover a bed, so I guess mine are technically lap quilts).

        Then, early this morning, I remembered a quilt top I made a long time ago and never quilted because I was afraid I would “mess it up.” It came about because I had made my first quilt, which my lovely partner immediately claimed. And when I say first quilt, I literally mean first quilt. I had no clue what I was doing, but I read everything I could get my mind around regarding free-motion stitching, appliqué, and piecing. I had no skills, but I was armed with information and self-confidence.

        I look at that quilt now and I’m amazed at what a good job I did! I think it was because I didn’t know enough to doubt myself. Here’s my first quilt (35x47”):

        first_quilt

        This is a combination of basic piecing and raw-edge appliqué. I used commercial fabrics that I really loved, along with early experiments painting fabric. I sewed the binding on by hand, something I still love to do because it relaxes me. Here’s a close-up:

        first_quilt_closeup

        I even stitched an “M” on it as a signature!

        For my second attempt, I decided I better learn to make a “real” quilt, which of course in my mind meant piecing, no raw edges, and a traditional pattern. I made it for my grandson, who I knew wouldn’t mind if it wasn’t perfect. I couldn’t be completely traditional even with this one, though, and opted for the “wonky” blocks:

        brandons quilt3

        That meant my two loves had quilts, so I needed one for myself. I started with a Ricky Tims convergence quilt center, then added appliqués cut from batiks and the batik borders. This was the largest quilt top I had made to date—35x53”—so of course I panicked and was too afraid to free-motion quilt it.

        garden_path

        Here’s a close-up:

        garden_path_closeup

        So, it’s been hanging in my studio closet for a couple of years now.

        I’m not quite as in love with this quilt now as I was back then; I think it has some design flaws, the colors aren’t what I use now, and I’m battling a desire to paint something on it or over-dye it. But I do have the confidence to free-motion quilt it, so I think I'll just leave it alone, quilt it, and make a nice lap quilt for the den. It’s 35x53”, so it will technically be the largest quilt I’ve made to date.

        Of course, the close-up shot makes me think I could trim the border, add some painted or stamped pebbles to the path then stitch those, do some thread painted flowers . . .