Friday, December 2, 2011
Return to Etsy!
Now I’ve reopened that shop with a few items, but I’ve also opened a store under the “Textile Traveler” name. This is my all-things fabric- and fiber-related store. Right now I have a few journals, a couple of baby (or lap) quilts, and a couple of pieces of hand-dyed fabric. I’ll be adding more items as time goes by.
I’m thrilled that I’ve already sold 3 journals!
This scrappy journal is featured today; it’s got fun stitched papers made of recycled junk mail, scrapbooks papers, and other interesting things:
I’d love any feedback you might have about the store or the items I’ve listed. Also, please follow me on Twitter (http://twitter.com/TextileTraveler) and/or “Like” me on Facebook (https://www.facebook.com/pages/Textile-Traveler/135028609925641).
Do you have an Etsy or other online store? I’d love to hear any tips you have or experiences you want to share. Please leave a comment and let me know how to find your store!
Monday, September 19, 2011
Sneak Peek
Have a great week!
Monday, May 30, 2011
The Haul from the Dye Bucket
I guess some part of me thinks that if I only had the right fabric, I could create something fabulous.
So, here’s the latest haul from the dye bucket:
Not enough to really inspire me yet, but it’s a start!
I hope you're all having a lovely Memorial Day weekend!
Monday, October 25, 2010
Present Tense
So I DID get a few things done over the summer . . . now that that's clear, fast forward to this week!
Here’s what I’m working on now:
Dyed fabric. I’m trying to get solids, because I’m reading Jean Wells’ Intuitive Color and Design. She uses a lot of solids in her work, and I love the way they look.
I used the gallon plastic bag method and squished a lot, but I still got some mottling:
I machine-pieced this quilt top a couple of weeks ago. Then I thought I would try some needle-turned appliqué. Why? Well, this is going to sound silly to some people: I love certain TV shows, but I get bored watching them and need something to do with my hands. I really enjoyed the hand-appliqué process and think I’ll do more of it. I’m using the methods from the Becky Goldsmith & Linda Jenkins Teach You to Applique the Piece O' Cake Way DVD, and it’s really not difficult at all:
I think I’ll hand-quilt it, as well.
Finally, I’m taking yet ANOTHER online class—this one with Jane Lafazio on her watercolor sketchbook techniques. Here are my first watercolor sketches:
I love these little sketches because they are quick and there’s no pressure, but I learn a lot about color, highlights and shadows, white space, composition, etc. Look for more of these in the next couple of weeks!
Is everyone excited about the Houston Quilt Show???!!!
Thursday, March 4, 2010
Catching Up
But the weather has turned all spring-like: warm, sunny days that make me want to tackle all those projects I’ve been thinking about but haven’t gotten around to. Of course, the problem is that the more time I spend working on projects, the less time I have to document or share them. And when I have lots of time to write blog posts, it means I’m not getting any work done, so there’s nothing to share (this is a corollary of that money/time conundrum; when there’s money for art, there’s no time, and when there’s time that usually means there’s no money).
Anyway, here are some of the things I’ve been creating/working on:
I finally got around to creating a portrait quilt, which has been on my wish list for a while. I’m using Maria Elkins’ technique here, which is a lot of fun and not nearly as hard as I thought it would be. I’m not particularly thrilled with how this turned out, but I learned a lot about both fabric and portraits that work, and those that don’t:
Btw, this is my lovely daughter, Amanda. I’ll be making more of these. I think I may make one for every member of my family, then stitch them all together.
This past weekend the weather was so gorgeous that I had to get outside. That always makes me think of dyeing/painting fabric for some reason, even though I typically end up doing it in the house. But I ended up creating some screens for deconstructed screen printing and then setting them in the sun to dry. Here is the result of my first deconstructed screen printing project:
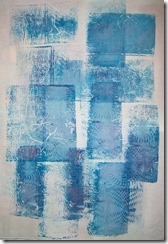
I’m really happy with this and loved the process. I’ll be doing more of this, as well.
While I had thickened dyes mixed up, I decided to paint on some fabric:
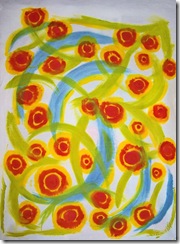
I’m not sure what I’ll do with this yet; I may cut it up and reassemble it.
And, I finally got around to ordering some Citra Solv (and some magnesium, which my body is always low on, while I was at it) so that I could try a technique for creating cool art papers. This is a messy process and the Citra Solv has a strong odor, so it’s best done outside. Plus, a sunny day helps the papers dry quickly. Essentially, I started with a National Geographic magazine and brushed concentrated Citra Solv on the pages, then closed up the magazine and let it sit for a while. I squeezed out the extra liquid/ink, then tore out the pages and laid them out to dry (this technique was in a recent issue of, I think, Cloth, Paper, Scissors). Here are the results:
Aren’t these scrumptious?
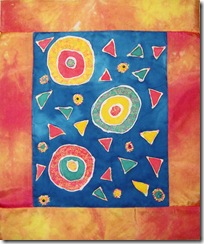
I’m almost finished with this small (about 8x10) piece I started a very long time ago. This is silk that I painted after applying a resist. I stitched it with wonderful 30wt. Trilobal poly thread, and added a dyed silk border. I’m still debating on whether to add a binding, create an envelope finish, or stitch around the edges:
Here’s a sneak peak of a wall quilt I’m working on; you’ll just have to wait to see the whole thing when it’s finished:
Let’s see, what else? Oh, here’s a wall quilt I finished a month or so ago, but I don’t think I’ve posted it yet. This is reverse appliqué made from batik-fabric charm squares. I added some beads and hand-stitching for embellishment, but it’s hard to see them in the photos:
And a close-up:
And finally, here’s my 6x6” weekly journal square, #50:
#51 is from Valentine’s week; it’s finished, but I haven’t taken pics yet. #52 is from my birthday week, and I haven’t finished it yet. And that brings me full circle—a FULL YEAR of weekly 6x6” journal quilts! I’m excited to stitch them all together. Stay tuned for the final results of that year-long project!
And don’t forget to check out my other blog, A Year of Pleasures, to see my latest fascination with cotton yarn.
I hope the weather where you are is showing some lovely promises of Spring, as it is here in Central Texas!
Monday, December 28, 2009
Time to Complete Those WIPs
Time, that is, in two senses of the word: I have this week off and therefore have a little extra play-time, and it’s time to get this stuff off the sewing table/design wall and finish it.
So, after a very lovely and busy Christmas, I’ve started with the easiest WIP. This one just needed a hanger on the back and a signature to be finished:
This is a silk & wool piece, created using a technique from one of my favorite books, Stitching to Dye in Quilt Art by C. June Barnes. After stitching, dyeing, and shrinking the piece, I added the washers and beads, then sewed the piece to a painted canvas. I’m displaying it in our den, but it’s a fairly small piece on a huge wall, so of course I need to make at least one more to hang with it.
And, I’ve caught up with my 6x6” weekly journal squares; these are for the month of December (with the exception of this week, which I’ll complete by the end of the week).
This marks the crocheted Christmas afghan I was working on the beginning of the month:
This one is influenced by work, and the boring, repetitive tasks I had to spend too much time on. Overlaid on that, though, is a little Christmas spirit:
This one is a compilation of the fabrics I used to make the kids & grandkids Christmas stockings; I thought it represented the holiday lunches, open houses, shopping, and other Christmas preparations very well:
And, here are the Christmas stockings, the last of which I finished at 5 pm on Christmas eve:
Finally, here is my 6x6” weekly journal square for the week of Christmas. I free-motion quilted the names of family members who were at Christmas dinner and helped to make it a lovely day:
And now, back to work on those WIPs. Or I could start the next silk and wool piece . . . hmmm, I think I hear that silk calling my name . . .
Tuesday, December 15, 2009
Quilts and Clay: Book Reviews
I stopped by the library the other day to pick up a couple of novels, and I was thrilled to see some unfamiliar craft books on the New Non-Fiction shelves. It turns out that neither of these books are exactly “new” (they were both published in 2008), but just new to my library, I guess.
The first one really got my heart pounding: Hand-Dyed Quilts by Marquetta Bell-Johnson. What could be better than combining two of my favorite things, quilting and hand-dyed fabrics? Plus, the author sounded familiar, and as I flipped through the book, I realized that I had seen her on an old episode of the tv show, That’s Clever! (or maybe it was Crafters Coast to Coast, the show’s earlier incarnation). In fact, I was so excited when I originally saw Marquetta’s episode that I immediately created some “hand-dyed” fabric based on her instructions. Here are the results:
Now, one reason I was excited was because, at the time, I knew nothing about dyeing fabrics, and I had no dyeing supplies. Bell-Johnson doesn’t use traditional fabric dye, however; instead, she uses airbrush paints (which I happened to have on hand), so technically her fabric is not dyed, it’s painted. However, Belle-Johnson claims in her book that airbrush paint, while an acrylic, migrates through the fabric and bonds with the fibers, which might explain why she classifies this technique as dyeing rather than painting.
At any rate, Hand-Dyed Quilts is an extension of the basic techniques the author demonstrated in that television episode. She takes us through the process of coloring the fabric, and most of her patterning is accomplished through various fabric-folding techniques, which are detailed in this book and include nice illustrations of luscious patterned fabric created through lots of color and folding variations.
Bell-Johnson’s book also includes basic quilting information, but this section of the book is disappointing, to say the least. It’s not clear who the intended audience is here. For example, hand-quilting instructions include this information:
1. Begin your stitches by backstitching and burying the thread tail between the layers of the quilt on the back side . . .
2. Sew, using the running stitch and following your chosen design . . .
Now, if I’m new to hand quilting, I’m not sure I’ll know what a backstitch is, how to bury thread tails, or how to complete a running stitch. I’m probably asking, “what is my ‘chosen design’ and how do I get it onto the fabric?” On the other hand, if I already know how to do these things, I’m probably familiar with hand quilting and so don’t need this section at all.
The last section of the book is a compilation of simple quilting projects, none of which really caught my attention or inspired me to create. However, I can imagine that new or fairly inexperienced quilters might find them useful for learning basic piecing and for completing simple projects using the fabric they’ve colored.
For me, this book was, overall, disappointing. I think the detailed information on folding and coloring fabric makes Hand-Dyed Quilts worth owning if you’re interested in that type of thing, particularly since the cost of it is fairly reasonable on Amazon (and especially if you get a used copy). On the other hand, there’s probably not much even in the fabric-folding section that can’t be found in a book on shibori.
Tomorrow’s review: Polymer Clay and Mixed Media Together at Last: Incorporating Craft Materials and Found Objects in Clay Figures, by Christi Friesen. Despite the ridiculously long title, you’ll want to stick around for this one if you’re interested in polymer clay.
Monday, November 23, 2009
Odds and Ends
Playing catch-up, both with projects and blogging . . .
The shelves are repaired and refilled!
Notice the absence of books . . . those are now stored closer to the floor so that they next time they hurl themselves down they won’t have as far to fall.
Here’s some fabric I dyed last week using the “color parfait” method from Ann Johnston’s Color by Accident (can you believe all these pieces were dyed in the same bucket at the same time?):
And two new weekly 6x6” journal squares; the first one is for the week of Oct. 25-31. This was the week before I went back to work, and so this square reflects anxiety and a lot of other complex emotions I was feeling at the time, as well as feeling a little frantic to get my projects wrapped up while I still had time:
The next journal square is from last week, and is influenced by my efforts to find balance and peace of mind, stay calm and unruffled, and develop a routine, as well as to work mindfully and carefully (i.e., with care):
I finished adding the border to my latest quilt top tonight, and I started cleaning off my worktable in preparation for the next project. I ran across a stack of WIPs, so I’m going to try to work on some of those—and finish a crocheted Christmas afghan I’m working—before starting anything else.
Happy Thanksgiving, everyone! I’ll be making my usual sweet potatoes, along with cornbread dressing, mashed potatoes, and a marbled butterscotch bundt cake, then hauling it all over to my daughter’s house. It probably would have made more sense for her just to bring the turkey here, but she was excited about having us come to her place, so there you are.
Tuesday, September 15, 2009
Odds and Ends
This is one of those “clean-up” posts; bits and pieces of things I’ve been doing, cool stuff, and WIPs.
A few weeks ago I won a blog giveaway from Lori of Laughing Girl Quilts. This was one awesome giveaway: fqs of Radiance fabric hand-dyed by Lori. And wow, are they gorgeous!
I don’t know a lot about this fabric, but it’s apparently a combination of silk and cotton. One side has a lovely sheen (the silk, I assume), the other a beautiful soft hand. Thanks again, Lori!
Here’s a piece of fabric I dyed a while back. I wasn’t crazy about this piece, and was going to use it for backing an art quilt. I went to iron it, and suddenly I saw a landscape in it, complete with trees and a stream. Can you see it? I think I’m going to experiment thread-painting this piece to enhance the landscape elements:
Here’s a piece I’m working on that involves paint, sheers, and FMQ with metallic thread:
Here’s a small patchwork quilt I’m making from the “leftovers” of the gem quilt:
In the centers of the blocks, you can really see the havoc wreaked by my 1/4” quilting foot being so far off. Anyway, it’s nice to use up those leftover blocks and scrap pieces.
And finally, more 6x6” weekly journal squares. The first one is from quite a while back; I wasn’t having much success preparing my own printable fabric, so I had to wait until I could buy some. This square is week 21, July 12-18. Influences: feeling tired, sick, and in pain. Too much heat and loneliness. On the positive side, I did start writing my morning pages again:
Week #28 was influenced by a new technique—learning to make yo-yos, and by wanting to attract a little more “color” (that is, good things) into my life. The blue braid around the edge represents my blue feelings that week:
Week #29 (last week) was influenced by my need for orderliness (and the clean craft room that brought about), along with relief that we finally got some heavy rains to cool things off and ease the drought (minutely) in Central Texas:
That’s all for now, folks!
Tuesday, August 4, 2009
Weekly Square #23
I’m missing a couple of my 6x6” weekly journal squares; I’ll circle back and finish those this week (I hope!).
This is last week’s square. I was inspired by the Sharpie marker experiment (see the previous blog entry), and in particular one of the pieces of fabric I colored.
I was also inspired by an online class I’m taking, “Calligra-Fun” (thanks Fannie and Sue, for mentioning this class on your blogs). I’ve been trying for a very long time to learn calligraphy, and I just can’t get it. Every book on calligraphy I have starts out by explaining how you hold the pen “at a 45 degree angle,” but none of them seem to feel the need to explain this. Does this mean the nib is at a 45 degree angle to the paper? Or that the nib is turned to either the left or the right at a 45 degree angle? I’ve tried both ways, but I can’t seem to get the thick and thin lines to come out right.
Calligra-Fun uses brush markers to create thick and thin lines, so there’s no 45 degree angle confusion involved. It's not really calligraphy so much as lettering. It's hard to tell in the picture that there really ARE thick and thin lines, since I added some highlights and outlining.
Clearly, I have a lot more work to do on my lettering, but this is a start, and I’ve already improved dramatically with just a little practice.
Other influences for last week’s square: the relentless heat, and my feeling of enervation that has kept me from creating anything. The blooms are surviving in our flower beds, though, and my creativity is starting to bloom again, as well.
On a completely different note, I met my sweetie for lunch today. On the way home, I noticed a handmade bread store, so I popped in. I sampled the Butterscotch Pecan bread, and, after practically swooning, bought a loaf. Heavenly!
Sharpie “Dyes”
The nice thing about going through a period where I’m not feeling creative is that I can finally get around to those techniques I’ve been wanting to try. In this case, it was coloring fabric with Sharpie markers. Sharpies will typically not run with water, but they will run with alcohol. For these pieces, I colored the fabric with Sharpies, then spritzed with alcohol until the colors ran together and colored the white fabric. After the pieces dried (alcohol dries very quickly), I heat-set the colors with a hot, dry iron.
I like this technique. I’ve been trying to figure out if there are advantages to it over other techniques I already use, and here’s what I’ve concluded:
- The effect is very similar to Dyna-Flow paints, but the advantage is that Sharpie markers allow drawing onto the fabric.
- Tsukineko inks would give me control and allow me to draw onto the fabric, and to get a similar color effect, but spritzing the inks with water to make the colors mix dilutes them quite a bit.
- Painting dyes onto fabric would give a similar effect, but that doesn’t allow quite as much control as markers, and my Procion MX dyes won’t work on synthetic fabrics, while Sharpie markers will.
So, here are the results:
The above piece is dupioni silk, colored with yellow, red, and orange Sharpies; while it was still wet, I added a little purple color here and there.
The above piece is Habotai silk. The picture shows a little more separation in the colors than you can see in person, but you can tell that much of the original drawing (the spirals) is retained on the habotai. I used a lot of alcohol to get the color to blend, and it was very wet, so I took a piece of cotton muslin and laid it over the silk to absorb some of the color:
The following piece is a synthetic fabric (taffeta); I stamped it with white acrylic paint and, when the paint dried, colored around it with yellow, red, green, and purple Sharpies. The colors blended particularly well on this fabric:
If you have some colored Sharpies lying around, try this technique; it’s fun!
Tuesday, July 14, 2009
Weekly Square #20
Somehow I’ve missed a week with my journal squares.
I knew I had skipped week 17 because I need to scan in a couple of pics for it. Yesterday, I went to do that and realized one of pics wasn’t where I thought it was, and I didn’t have the energy to look for it.
Instead, I decided to work on last week’s square, but then I realized I missed week 19. So, that’s two weekly journal squares I owe myself, not counting this week’s. Confused? Yes, me too.
ANYWAY, here’s 6"x6" weekly journal square #20 for July 5-11:
This piece started with a watercolor I painted last week. I scanned it into the computer, then printed it onto Lesley Riley’s TAP transfer paper. I ironed that onto muslin, then fused the image to hand-dyed fabric. I added a layer of batting to the back, then embroidered around the edge of the image. I cut away the extra batting on the back, added another layer of batting and more hand-dyed fabric for the backing, then quilted the square with invisible thread (I wished afterwards that I had used the smoke thread so it wouldn't be so bright). Finally, I zigzag stitched around the edge to finish the square.
Influences for this week’s square: like Weekly Square #16, I think this one reflects my anxiety/uncertainty/curiosity about what lies ahead. I like the juxtaposition between the right side (closed, interior) and the left side (open, exterior) of the painting, although I can’t really articulate the meaning of that.
Next on the agenda: backing up and creating the missing weekly journal squares. Fortunately, I’ve written notes every week for what I want the squares to reflect, so I have a place to start.
Friday, June 26, 2009
Weekly Square #18
This is my 6x6” weekly journal square for this week. You may be (but probably aren’t) wondering what happened to last week’s square, #17. Well, my 30th high-school reunion was last Saturday night, and I was waiting to get the picture disc I ordered from the photographer (hurray, digital images!) since I want to incorporate at least one into last week’s square. The disc came in the mail today, so now I’ll circle back and work on that one.
Influences for this week’s square include: techniques from my new favorite book, Stitching to Dye; the beautiful yellow bells that are in bloom in the front yard; and the heat wave (highs around 103-104; LOWS in the upper 70s) that’s going to quickly fry everything.
This is dyed (blue, green, and magenta) habotai silk on wool felt, with silk velvet "flowers" stitched on top. The whole piece was then re-dyed in lemon yellow.
The “binding” on this week’s square is something a little different; I cut the selvedge edge from a piece of sheer fabric and fused it to the front, then turned it and fused it to the back.
Monday, June 15, 2009
Weekly Square #15
I'm not working on much these days other than the hand-quilting I started while in the hospital. I am trying to get caught up on weekly journal squares, though. Somehow it seems appropriate that I make these as close to the "moment" as possible, even if they don't turn out well. These journal squares are supposed to represent the actual weeks of this year, so if I can't concentrate, or don't have the energy to do good work, that's as much a part of my life as the weeks when I'm able to take more care with the journal square.
Here is my weekly journal square for the first week of June—the week I had surgery and was in the hospital. This piece started with some complex cloth I created a long time ago, using various dyes, over-dyes, and flour-paste resist.
- I ripped the fabric in half, then laid the 2 halves on batting.
- I ran a line of red Shiva Painstik down the tear, then used black embroidery thread to sew the Xs.
- I added the backing, then hand-quilted various areas of the piece.
- I finished the square with a whip-stitched binding, using embroidery thread.
Influences for this square are, I guess, fairly obvious, but strangely complex: surgery, stitches, pain, sleep, strange dreams, boredom, anxiety.
Wednesday, June 10, 2009
Weekly Square #14
I’ve fallen a little behind with my weekly journal squares. I wanted to finish this one before I went to the hospital, but I didn’t have time. I’m so bored with “bed rest” and daytime television that I decided to at least make an attempt to finish it up this morning, and hurray! success!
This square was for the week of May 24-30. It was influenced by the Stitching to Dye and Inspired to Quilt books that I was working with; by my sweetie’s garden, and those lovely green shoots pushing up through the dirt; and by the clear, open blue skies of early summer that felt like freedom before heading to Houston for my hospital stay.
Thursday, May 28, 2009
WIP? or File 13?
What do you think? Should I keep going with it? Is it too busy? Are the colors just ugly? Too many textures? Does it lack contrast? Is there a good focal point? Is it boring?
Any and all comments and suggestions will be appreciated, and please remember that you can make anonymous comments.
Tuesday, May 26, 2009
Stitching Exercise Continued
Here is the piece I wrote about yesterday, now with dye and all ready to be embellished!
Monday, May 25, 2009
Another Book Review
After writing yesterday’s post about the way I tend to read craft books, I challenged myself to slow down and read the next one carefully, from beginning to end. Fortunately, I had the perfect book for this type of exercise.
I’ve made a couple of quilts that I stitched first, then colored with either Neocolor crayons or fabric paints. I really enjoy this “backwards” process and have been wanting to pursue it further. So when I ran across Stitching to Dye in Quilt Art: Colour, Texture, and Distortion by C. June Barnes, I knew I had to have it. I glanced at it when it came in the mail, but it wasn’t until I was scouting around for my next project that I remembered I had it.
Barnes’ book includes good, basic information about dyeing fabrics, free-motion stitching, the types of fabrics that work best with her techniques, etc. In addition, there are two extended technique sections in the book, both packed with information and exercises. The first section deals with stitching various fabrics together, adding free-motion stitching, then dyeing the quilt.
The second section was a surprise for me, since I primarily bought the book for the previous technique. In the second section, Barnes details ways to differentially shrink fabric, which I’ll come back to later in this post.
The book includes exercises that progress in difficulty, so after reading through to the end of Exercise 1, I decided to jump in and give it a try. I pulled out various white, off-white, and cream-colored fabrics and pieced them together. I made my quilt sandwich and free-motion quilted it using cotton thread so that it, along with the fabric, would take dye. Here’s a pic of the small quilt:
I then dyed the quilt in a mix of Sky Blue & Magenta:
As you can see, the various fabrics take the dye differently and create an interesting mix of textures and colors. Barnes recommends that you dye your pieces flat in a shallow tray or pan, or in a large bucket. I didn’t have a pan large enough, so I tried squishing this piece into a container and periodically squeezing the dye through. As you can see, I ended up with a few mottled spots, so before I try the technique again I’ll head to the store for a large, flat tray. This piece is now ready to be further embellished; Barnes also includes ideas in her book for additional embellishments.
As I mentioned, the second half of the book focuses on layering different kinds of fabric that shrink at different rates, stitching them, shrinking them through washing and drying, then dyeing them. For the first exercise in this section, I started with wool and layered silk charmeuse over it. I heavily stitched the piece with cotton thread (Barnes includes some excellent information on the effects of various kinds of stitching)
then washed and dried the piece
I haven’t yet dyed this, but I’m very happy with the texture that resulted. Barnes includes a lot of information in this section of the book about various inclusions to get particular effects, so I’m anxious to continue these exercises, as well as those in the first half of the book.
I’m really thrilled with this book and looking forward to continuing to work through it. In fact, I’m so excited about it that I’m considering starting a group to work through the exercises in the book and to share questions, ideas, concerns, and results with each other. I won’t be able to do that until I’ve recovered from my surgery, but let me know if you’re interested in participating, and I’ll get back to you within a few weeks.
Stitching to Dye in Quilt Art: Colour, Texture, and Distortion by C. June Barnes is available on Amazon. Unfortunately, it’s not one of the books you can “look inside” of, but you can find more information through that link.
Addendum: Although there's no "look inside" feature on the US version of Amazon for this book, Sue left a comment on this post letting me know that sometimes books published in the UK have the “look inside” feature on Amazon UK. So for anyone who wants to take a look inside Stitching to Dye, click here.

