I’ve had a burst of energy after a rather draggy February. Fortunately, I know that around January/February my creativity tends to hibernate, so I’ve learned to be patient with it, confident that I can benefit from the creative “downtime.”
But the weather has turned all spring-like: warm, sunny days that make me want to tackle all those projects I’ve been thinking about but haven’t gotten around to. Of course, the problem is that the more time I spend working on projects, the less time I have to document or share them. And when I have lots of time to write blog posts, it means I’m not getting any work done, so there’s nothing to share (this is a corollary of that money/time conundrum; when there’s money for art, there’s no time, and when there’s time that usually means there’s no money).
Anyway, here are some of the things I’ve been creating/working on:
I finally got around to creating a portrait quilt, which has been on my wish list for a while. I’m using
Maria Elkins’ technique here, which is a lot of fun and not nearly as hard as I thought it would be. I’m not particularly thrilled with how this turned out, but I learned a lot about both fabric and portraits that work, and those that don’t:

Btw, this is my lovely daughter, Amanda. I’ll be making more of these. I think I may make one for every member of my family, then stitch them all together.
This past weekend the weather was so gorgeous that I had to get outside. That always makes me think of dyeing/painting fabric for some reason, even though I typically end up doing it in the house. But I ended up creating some screens for deconstructed screen printing and then setting them in the sun to dry. Here is the result of my first deconstructed screen printing project:
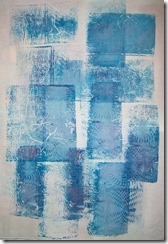
I’m really happy with this and loved the process. I’ll be doing more of this, as well.
While I had thickened dyes mixed up, I decided to paint on some fabric:
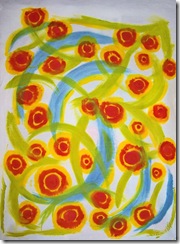
I’m not sure what I’ll do with this yet; I may cut it up and reassemble it.
And, I finally got around to
ordering some Citra Solv (and some magnesium, which my body is always low on, while I was at it) so that I could try a technique for creating cool art papers. This is a messy process and the Citra Solv has a strong odor, so it’s best done outside. Plus, a sunny day helps the papers dry quickly. Essentially, I started with a National Geographic magazine and brushed concentrated Citra Solv on the pages, then closed up the magazine and let it sit for a while. I squeezed out the extra liquid/ink, then tore out the pages and laid them out to dry (this technique was in a recent issue of, I think,
Cloth, Paper, Scissors). Here are the results:

Aren’t these scrumptious?
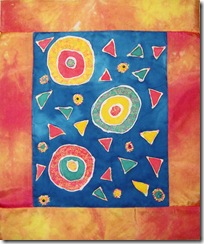
I’m almost finished with this small (about 8x10) piece I started a very long time ago. This is silk that I painted after applying a resist. I stitched it with wonderful 30wt. Trilobal poly thread, and added a dyed silk border. I’m still debating on whether to add a binding, create an envelope finish, or stitch around the edges:
Here’s a sneak peak of a wall quilt I’m working on; you’ll just have to wait to see the whole thing when it’s finished:

Let’s see, what else? Oh, here’s a wall quilt I finished a month or so ago, but I don’t think I’ve posted it yet. This is reverse appliqué made from batik-fabric charm squares. I added some beads and hand-stitching for embellishment, but it’s hard to see them in the photos:

And a close-up:

And finally, here’s my 6x6” weekly journal square, #50:

#51 is from Valentine’s week; it’s finished, but I haven’t taken pics yet. #52 is from my birthday week, and I haven’t finished it yet. And that brings me full circle—a FULL YEAR of weekly 6x6” journal quilts! I’m excited to stitch them all together. Stay tuned for the final results of that year-long project!
And don’t forget to check out my other blog,
A Year of Pleasures, to see my latest fascination with cotton yarn.
I hope the weather where you are is showing some lovely promises of Spring, as it is here in Central Texas!


